Showing posts with label small scale lights. Show all posts

23 November 2013

Kit Review: 1/48th Christmas Market Stall

Most of you will know by now that I am specialising in lighting dolls houses and scale models with LEDs, especially smaller scale kits either for 1/48th & 1/144th dolls house kits or other smaller scale models.

Last week Jane Harrop asked me to design a kit for her new Christmas Continental Market Stall.  She wanted a warm white LED to be powered by a coin cell battery which would be hidden on the back of the stall.

I got a kit to make up so I could design and demonstrate the lighting and so in return I am reviewing the kit.

The kit was smaller than I imagined when I first thought of a market stall.  I think I'm still getting used to the concept of 1/48th scale being so small having worked in 1/12th scale for so long!

The kit came in a lovely brown envelope with a picture of the finished market stall on the front and I also had along with it a few small brown envelopes containing a selection of 'gifts' to sell in the stall including tiny Christmas trees, 3D trees, little houses and gingerbread houses.

On emptying the contents of the kit onto my workspace I had the following parts.  The shell of the market stall is etched with lines to emulate the wooden boards and all the pieces are precision cut on a laser cutter.  There wasn't much of a burnt smell with this kit as there can be with some and the edges were a nice rich brown rather than burnt black so no sanding was needed.
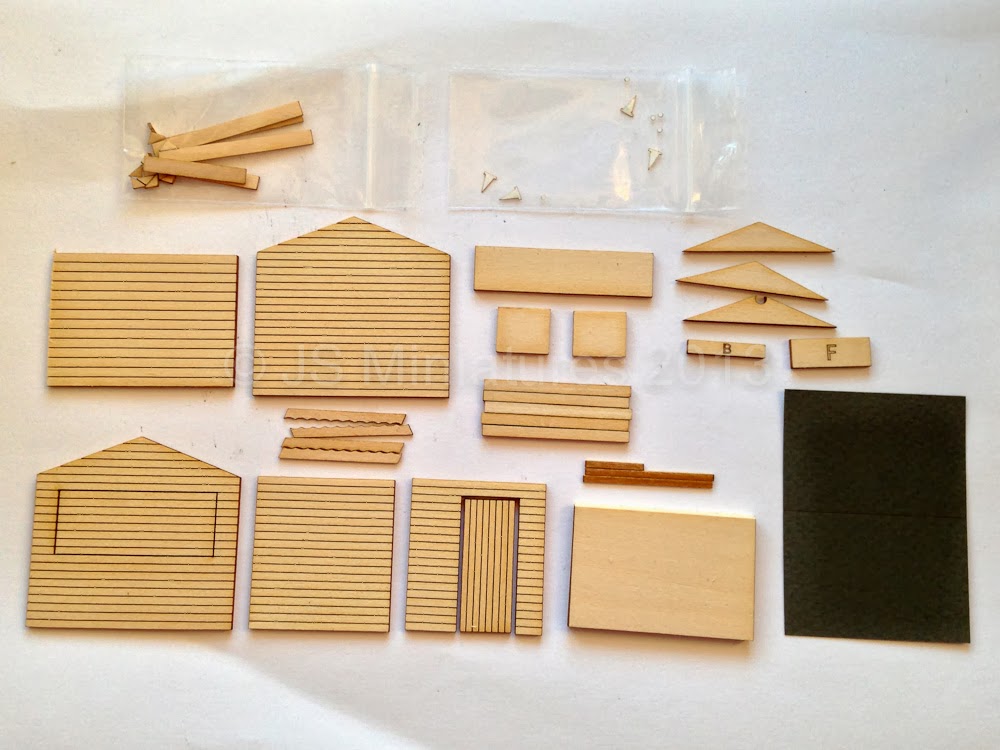
The market stall kit components
 The kit is comprehensive in it's contents.  You get everything you need including sandpaper.  The only items I had to provide was glue and wood stain.  You can stain, paint or leave the stall natural.  I chose to use some Light Oak stain I had which matched the colour of the edges of the wood nicely.

The instructions are very easy to follow and colour photos show the various stages so this kit is easy to assemble.  The sandpaper provided is called 'Abranet' and it's a bit of a revolution in sandpaper because it's full of holes so instead of the dust clogging the sandpaper and going all over your wood, it instead falls through the holes to the paper underneath leaving your wood basically dust free and you can wrap up and throw away the paper afterward.  Brilliant!
There's plenty of life left in the sandpaper afterwards for future projects too being of the new type which is long lasting.

After a quick sand of the pieces I used a bit of paper towel to apply my wood stain, giving a light coat as suggested in the instructions to prevent warping.  My kit was fine and you don't need much to add a nice colour to the wood.

Assembling the kit was pretty straightforward.  All the pieces fitted together well.  The only sanding required was to the door frame which was slightly long (as noted in the instructions).  For that I glued the wood pieces into the doorway and once dry, placed the door in position and used an emery board (nail file) to remove the excess wood from the bottom.  Just a few strokes and it was done.

The stained and assembled market stall kit
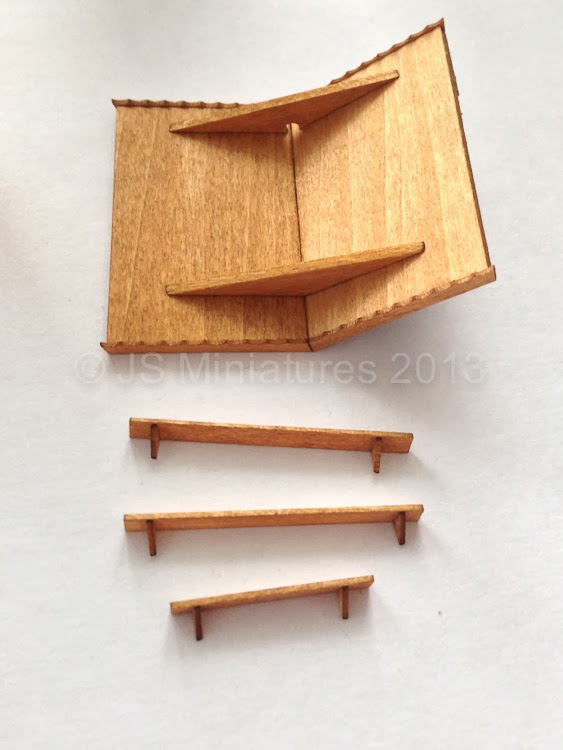
The assembled roof and shelves
If you are going to light the market stall there is an additional roof strut provided which has a hole in it for the LED and wire to fit through (see photo).

I tried hinging my stall shutter by using a bit of paper.  It was mostly successful but has a tendancy to not open fully, hiding some of the interior.

The sanding and fixing of the shutter was the only photo I found unclear as it looked like it was fixed at 90 degrees but the instructions suggested a chamfer was to be added and I wasn't sure why.

Once the market stall was assembled I made up the shelves.  There are 3 shelves for the walls and also a  table for the display of your Christmas goods.

I had to sand the ends of the table slightly so that it would fit inside the stall, again using an emery board to keep the end square.

The shelf brackets are tiny but spares are provided.


Some of the gifts to sell in your market stall
The final task was to make up the gifts for inside the stall.  The tiny houses were easy and I left them natural and just glued them onto the shelves.  The little trees are somewhat fiddly and a pair of tweezers is essential but with a little patience they're not that difficult to do.  I stained them while still in the wood piece and then put them together.

3D trees
3D trees
The 3D trees are delightful.  Such amazing detail given how small they are ( the photo makes them look bigger than they are and I should really have taken this with a ruler against them!).

Again, I stained them first and then popped them out one by one so the pieces didn't get mixed up and assembled them using tweezers.

The final step was to glue the decorations onto the shelves and table and then glue the shelves into the stall.  I did have to think about the arrangement as some of the single trees are quite tall and so don't really fit on the shelves so you need to pick and choose which you want to use.  I chose not to use the gingerbread houses as I was running short of time but these would fit on better.  The 3D trees are smaller and so they work well.

 It only took 2-3 hours to make and the light really does make such a difference.

So, here it is... the completed market stall with gifts and tiny nano LED light!

The completed market stall with gifts and light
The back of the stall showing my lighting kit containing coin cell battery holder and on/off switch.  I glued these on with superglue.  Just a couple of spots on the holder and one on the switch is enough.
The back of the stall with the battery and on/off switch

If you love the kit and wish to purchase one Jane has them on her website and will also have them at the York and Kensington fairs.

If you want to light the kit you can buy the lighting kit shown here from me by going to my website.

I hope you have enjoyed the review.

Jennifer,


23 August 2013

August in a nutshell

We had delivery of a couple of additional house guests last night.  As I have sorted out my e-mails and packaged up an order I have been followed by a pair of beady black eyes.  Apparently, the novelty of a printer and natural curiosity has got the better of my companion and it's been too much excitement to allow the usual daytime sleeping.

Now I have peaked your interest I'm sure you'd like to know who the house guests are?

Well, they are called Cinder & Treacle and they are a pair of female chinchillas that we are looking after for friends for a couple of weeks.  We have a pair of male chinchillas ourselves but they are kept in our spare bedroom so Cinder & Treacle are staying in our living room.

Treacle now seems to have lost interest and has decided that sleeping IS the best way to spend the day so I will continue my post...

July was a very busy month for me and so August has been a little about catching up with some of the back end stuff that often gets put off and deciding what the next new adventure should be for my business.

As a bit of a recap I launched a new website www.smallscalelights.co.uk at the start of August, dedicated to my LED lighting range and have been adding new products to that during the month.

I have had some interesting sales this month including selling some of my nano chip LEDs to a chap making a model of the Enterprise from the new Star Trek movies, some amber and warm white flickering LEDs for a diorama and some of my 3mm LEDs with clear lens clips are being used for spotlights in a modern art gallery room box.  Hopefully I will have some photos for my customer gallery when these are all completed.

At the start of July I took some workshops at the Stafford Making Day and I have received a couple of photos of my workshops which I thought you might like to see.  I'm the one in front of the window.

Stafford Makers Day Workshops - Beginners Guide to LEDs

Stafford Makers Day Workshops - Making a table lamp
I had a lot of positive feedback from my workshops and I would like to offer these to everyone.

I already do Online workshops through the Minis4All Yahoo group and with the technology available to us today it's very easy to communicate and there are lots of ways that information can be provided making online workshops a popular alternative.

This is where you come in! I would like you to help me develop these workshops by telling me what would work best for you. I would like to tailor my workshops to fit your needs so if you can take 5-10 mins to answer a few questions I would be very grateful.

  1. Would you prefer step by step instructions in PDF form, a video demonstration or both?
  2. Would you like a set time to complete the task or to do it at your own leisure? 
  3. Would you like to chat with me to ask questions and get feedback?
  4. If I set up a closed Facebook group to enable you to ask questions and show your finished items would this be of interest?
  5. Or would you prefer a Yahoo group? 
  6. For a workshop lasting about 1-1.5 hours would you consider £10-20 to be reasonable? (Cost will be determined by price of the kit and associated additional material such as a booklet)
  7. Any other comments?
To provide your feedback please E-mail me or leave your comments below.

Your feedback is important to me so thank you for taking the time to comment.

Jennifer,

2 August 2013

New Small Scale Lights Website Launched!

I have been working hard behind the scenes for a few weeks now to bring you a brand new website dedicated to LED lighting for dolls houses and the broader world of model makers.

The intention of the new site was to focus entirely on LED products which are specifically chosen to be perfect for a range of model making hobbies, from dolls house projects to model trains and boats.

I have expanded the available products so if you want to do your own soldering you can buy the LEDs and wire separately.

It's designed to be easier to navigate if all you want are pre-wired LEDs or other associated products without having the other dolls house products on the website.

I will be adding more products and content over the coming weeks so it's worth keeping an eye on the website or this blog for updates if it's something you're interested in.

Pre-wired Nano chip LEDs
Pre-wired Nano Chip LEDs
You can visit my new website here: Small Scale Lights

I hope you like the new site and bookmark it for future use.  Comments welcome :)

Jennifer,