14 June 2015

Tutorial - Miniature Trees, Bushes & Topiary

Following on from my last tutorial on curved fencing (click here if you missed it) I am now going to look at making trees and bushes from Seamoss and topiary ball trees.  This tutorial is applicable to all scales if sizes are adapted to suit.

Seamoss Trees & Bushes


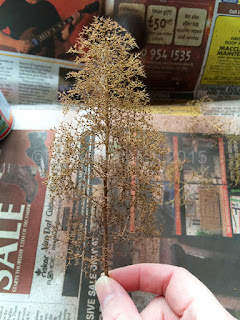
Seamoss Tree in 1/48th Scale


Seamoss is a natural plant material that is very useful for making trees in 1/48th or railways scales and also bushes in 1/48th, 1/24th. 1/12th scales.

It naturally forms branching structures so it's a bit easier to use than wire where you have to shape it yourself but is fairly fragile so care must be taken when handling.  If branches break off you can glue them back on with tacky glue or superglue.

Step 1:  Seamoss has little leaves on it which need to be gently removed with tweazers.  You can also remove or reattach any broken branches and shape as required.  Trimmings can be used for bushes and small plants.  If you want a thicker trunk you can add a bit of air dry clay or even pieces of masking tape to the lower truck before painting.

Seamoss with leaves removed and trimmings kept
Step 2:  Seamoss is naturally a yellow colour so it's best to first spray it brown with spray paint.  I have used a mid brown by Humbrol.

Spray painting the sea moss
Painted Seamoss Tree
Step 3: Add scatters.  I have chosen to use fine scatters in a mix of light and dark green.  The dark green is applied first and goes on the underside of the branches to add depth and shadow.  The light green goes on to the upper side and branch tips to show fresh growth.

First give a good coat of hairspray which enables the scatter to 'stick' to the seamoss.  Any cheap hairspray is fine or you can use artists matt spray sealer.

Sprinkle on the scatters.  I recommend doing this over a tub /container so you can keep the rest to reuse.

It's a good idea to use an old paintbrush to carefully remove scatter stuck to the truck or branches where it doesn't look natural.

Once you are happy spray the tree with spray adhesive and then another coat of hairspray to help the scatter stick.  Spray adhesive is quite good for seamoss because it's more fragile so doesn't risk breaking any branches etc.
The alternative is a mix of 4 parts water to 1 part PVA and a drop of washing up liquid in a clean garden or household sprayer but I find you struggle to get a fine enough mist for the seamoss.

If there's any bits where scatter hasn't stuck you can dip into PVA glue and apply scatter that way.

Leave to dry.  Once dry it should be pretty robust as the glue helps firm up the structure.

Tip: Seamoss can also be used for larger trees if you break down the pieces and use the smaller pieces as finer branches on a wire tree or other model tree framework.

Bushes:  Bushes are done in the same way but you can also use a brightly coloured scatter to suggest flowers.
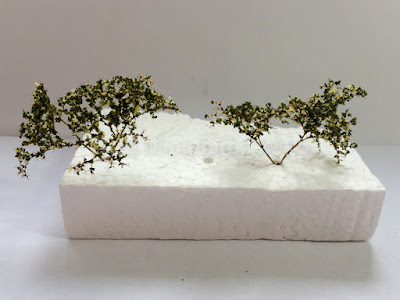
In this example I've use a fine green scatter with yellow through it.
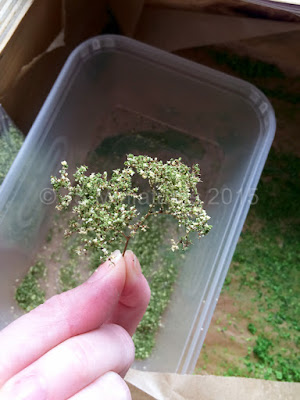
Seamoss Bush
Seamoss Bush

Seamoss Flowering Bushes
Materials Required:
Links provided where I sell the item

Seamoss
Scatters in dark and light green
Hairspray or artists matt sealer
Spray adhesive or PVA glue (thinned)
Tweezers
Brown matt spray paint


Topiary Ball Trees

Topiary ball trees can be made for any scale.  Just select the appropriate size polystyrene ball.  Here I've made 1/12th scale ones using 20mm balls (25mm would also be suitable) and 1/48th scale ones using 10mm balls.
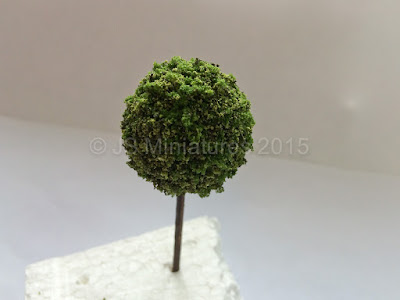
1/12th Scale Topiary Ball Tree
Step1: Glue a cocktail stick into the hole of the polystyrene ball - leave loose for 1/48th scale as we will replace with wire at the end and leave to dry.

Step 2: Paint the polystyrene balls brown using acrylic paint.  I used DecoArt crafters acrylic in chocolate.  Leave to dry.
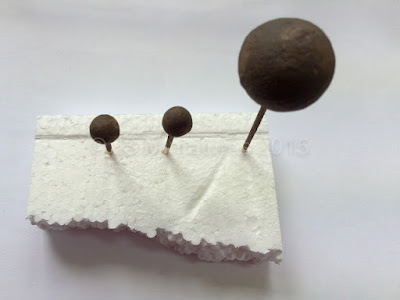
Polystyrene balls painted brown
Step 3: Spread PVA or tacky glue over the ball, trying to get as even as possible.  It can be thinned slightly if required but you don't want it running off!

1/12th scale ball with glue

1/48th scale ball with glue

Step 4: Mix together two tones of green scatter.  A dark and light green works nicely in a medium/course grade for 1/12th scale and a fine grade for 1/48th scale.

The dark green is the older growth and the light green represents the fresh growth.

Sprinkle over the glue covering all areas.  It's best not to touch the ball as the scatter will stick to your finger rather than press to the ball.  You can add more glue and scatter afterwards as required.
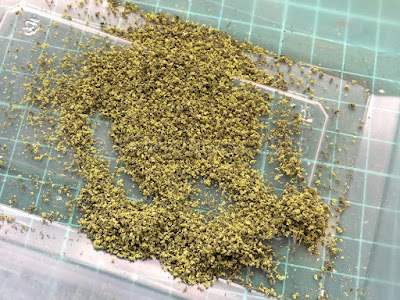
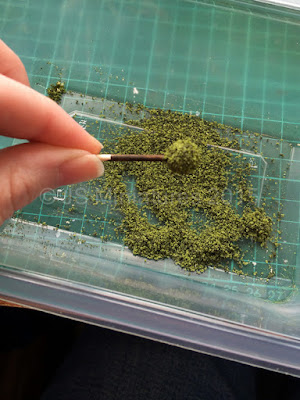
Mix of fine scatter for the 1/48th scale ball

Applying scatter to the 1/48th scale ball
Spray with hairspray to help hold the scatter and then leave to dry.  I find a bit of polystyrene is good to stick them into or you could use blue tack or similar.

You should end up with something like this:
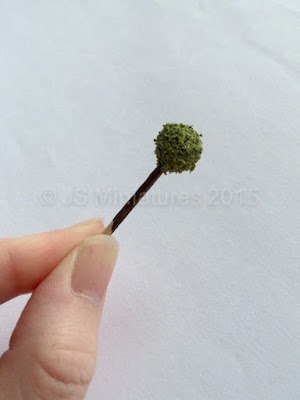
1/48th Topiary Ball Tree - after scatter
Once dry you can add additional scatter with drops of glue in any bare patches.

For the 1/48th scale topiary ball trees I used some florists wire twisted together for the trunk.

1/48th Topiary Ball Trees

I still need to get a pot for each of these!

Materials Required:
Links provided where I sell the items

Polystyrene balls (I have these, just need to update the website so please ask if you'd like some)
Green scatters
PVA glue
Cocktail stick or paper covered florists wire
Brown acrylic paint
Hairspray or artists matt sealer


I hope you have enjoyed the tutorial and find it of use.  More tutorials coming soon.

Jennifer,


15 May 2015

Tutorial - Curved Fencing

Following on from the launch of my landscaping materials last week I thought I'd do a quick tutorial on how easy it is to bend it to create curved fencing.

If you want to create that unique look not possible with standard plastic or wood fencing then this is the tutorial for you!

The wood pulp board used for the fencing is a very versatile and unique product.  It doesn't separate into layers like matt board or cardboard and comes in various thicknesses.  It's also suitable for laser cutting meaning it's easy to create intricate designs that don't break the bank.

One of the killer features of this board is it's ability to be curved and then retain that curve once dry.  I've already used it successfully on a previous collaboration with Quernus Crafts for Christmas.

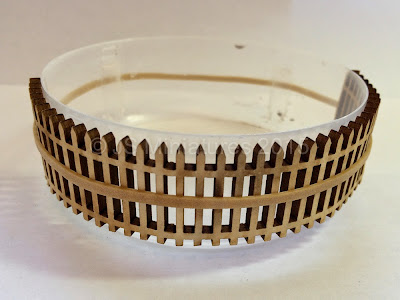
Curved Fencing Example
So without further ado...

Tutorial:

Step 1:  Find a suitable sized container that has the right sized diameter for the curve you want to make.

Step 2:  Take your piece of fencing and using your fingers, dampen both sides with water.  It shouldn't be dripping, don't run it under the tap, just enough to dampen the surface.  Shake off any excess.

Step 3:  Starting at one end, carefully bend the fence around the container, working your way around and then hold in place with an elastic band.  I used the top off a ear bud tub that I use for holding paint etc.

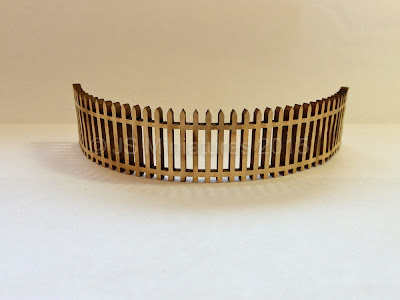
Dampened fence curved round container and held with elastic band

Step 4:  Set aside and leave to dry.  Should only take an hour.

Step 5:  Take off the elastic band and you should have a curved fence.

Dry and curved fencing

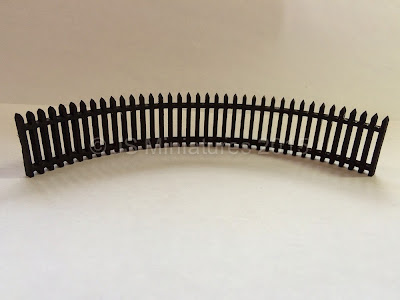
Step 6:  Paint in the colour of your choice.  I used Decoart Crafters Acrylic and one coat of black was enough.  White may need 2 coats.  You can leave it natural or stain for a wood effect if you wish.

Painted curved Fence

Painted curved Fence

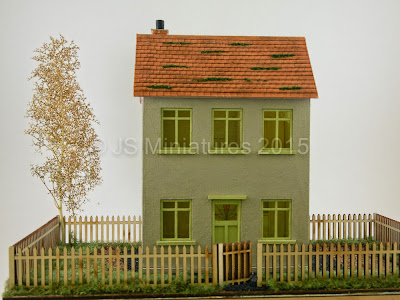
Step 7:  Glue in position using PVA glue.  Wood glue or tacky glue are best.  There is flexibility in the fence so you can tweak the curve a little if you need to.

Fence posts and a gate are provided so panels can be joined together at corners.

And that's it!  Simples!

Hope you enjoyed the tutorial,

Jennifer,


8 May 2015

New arrivals... Landscaping Materials

I can't believe how quickly the months are flying by.  It's May already and summer is nearly here.  

With the onset of spring and the welcome fresh new growth after the winter I have been hard at work behind the scenes putting together my new range of landscaping materials specially selected for their suitability for 1/48th scale and smaller.  You can read about these below along with some 'How To' tips to help you get started.


Click here for : Landscaping Materials


New Landscaping Materials
Above is a photo showing a few of the new products along with one of my house base kits which are ideal for using along with the landscaping materials.


These specifically selected premium materials have been chosen for their suitability for use in 1/48th scale and are provided in handy packs to suit 1-2 projects depending on size.

I have designed my own set of laser cut fencing which are cut from a special wood pulp board which doesn't split at the edges but can be easily cut with a craft knife and painted with standard acrylic paint.  It also has a very unique property that allows the fencing to be bent to shape.  Just dampen the fence both sides and curve round an object and leave to dry.  Once dry it will hold the curve permanently and can then be glued to your layout.

Other materials include a range of scatters for trees, bushes, hedges, flowers, paths and sand for beach scenes.

Selection of ground materials for paths, earth and grass.
Hedges are pretty easy to make or you can choose our pre-made formal hedge.
Pre-made formal hedging

Trees
I have in stock two types of tree making materials.  For those who are more experienced you can buy a length of tree making wire which can be separated and twisted to form the shape of any style of tree you like.  The wire structure can either be simply sprayed brown with spray paint or covered with air dry clay or Milliput to form a thicker truck and branches and then painted.

The other option is a Seamoss tree which is a natural material which has a very realistic tree structure.  This can be used as is for a winter tree or scatters can be added to make a 'leafed' tree.  Simply spray with spray adhesive and dip or sprinkle the scatter over the top and leave to dry.  You can add blossom or fresh growth by dipping ends of branches in PVA glue and adding light green scatter for fresh growth or coloured scatters for blossom.

Seamoss can also be used in small piece for shrubs and bushes.  It is quite delicate as it is a natural material so should be handled gently.

Seamoss Tree only £1.75
Tree Making wire only £1.15


Hedges
I have two hedge materials in stock.  The first makes informal or formal hedges and uses rubberised coir as the base structure.  These are pre-cut and painted and ready for you to add your chosen scatter materials to.
The other hedges are formal hedges with a foam core.  These are pre-made and ready to go.

Hedge kit
Formal hedges


How to make a hedge:
The hedge kit comes with 4 pieces of pre-painted 'hedge', 6" long, 1" high and 1/2" wide, perfect for 1/48th scale.

Start by mixing up a scenic spray glue in a clean garden or household sprayer with 1 part PVA to 4 parts water and a drop of washing up liquid to help flow.  (Spray clean water through nozzle after each use)
Cover the hedge with your chosen scatter colour(s) and then spray throughly with the scenic glue.  
Spray with hairspray or artists fixative (use a ventilated area) and leave to dry for 24 hours.

You should then have a robust, flexible hedge which can be trimmed to make a formal hedge.
The rubberised coir can also be teased out before adding scatter to make a wild countryside type hedge.

Hedge pack of 4 just £4.99
Formal hedge pack of 6 just £5.25

Click here for : Landscaping Materials

Jennifer, 

10 February 2015

New toys....

Last week I decided to get a new toy tool.  As my business has grown, the amount of time I'm spending soldering has increased.  Apart from a few obvious things that I buy in I do pretty much make everything myself so I spend a large portion of my week soldering.

Although I already had a fairly sophisticated DIY solution for extracting the solder fumes it was becoming more obvious that it wasn't quite doing it's job.  That and the horrible weather recently, which for the North West means wet and windy, made having a hose stuck out the window less than ideal.

The old DIY enclosure
Although I blocked off the window to reduce cold air coming in it was still cold and all this windy weather the last few months has meant that quite often, wind was blowing back down my extraction pipe.  Not ideal!

My office always had a bit of an electrical smell, even after having the window open at the end of the day.

So, after a bit of research and a few e-mails back and forth with an incredible helpful chap at Vodex I chose my solution.  It arrived in a fairly big box but the unit itself is pretty compact, easily fitting under my workbench.


So, what did I buy?

The extraction arm & nozzle

New vacuum extractor

Well, it's a proper fume extractor with a very good HEPA filter system that sucks all the fume down the pipe and then cleans it to 99.97% before blowing it back into the room.  The HEPA filter fills half the box with the other half being the fan.  The nozzle is much like a hoover and it certainly sucks your hand if you get too close.

I must say I'm very pleased.  Having used it for a week now it seems to be doing what it should and my office no longer smells.  It's a slightly different way of working as you have to make sure the nozzle is correctly positioned to capture the fume but I generally work in the same area using my 'third hand' tool so this is pretty easy to do and I now vary rarely smell the solder which means it is all being sucked away.  It's also given me a lot more space on my work surface and once I tidy up a bit it'll be even better!

I couldn't recommend the guys at Vodex highly enough.  The customer service was excellent and meant I didn't end up buying the wrong tool, which is quite easy to do.

Jennifer,


12 December 2014

New Products - Bases for smaller scale kits

It's a familiar situation for many of us...You've built your house kit and added some lighting to really bring it to life but what do you do with the wires and the battery box?

Well, the solution is often to make a base for the kit so you can hide the battery underneath and perhaps also add a garden or other landscaping but what if you could buy a base that was specially designed and had a concealed drawer to hide the wiring with an easily accessible on/off switch?

Ta da!

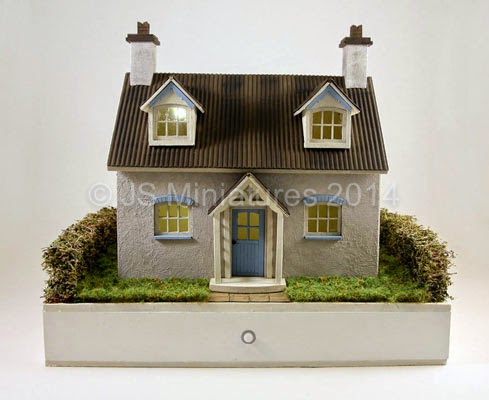
Assembled and landscaped small base kit for BlueBell Cottage


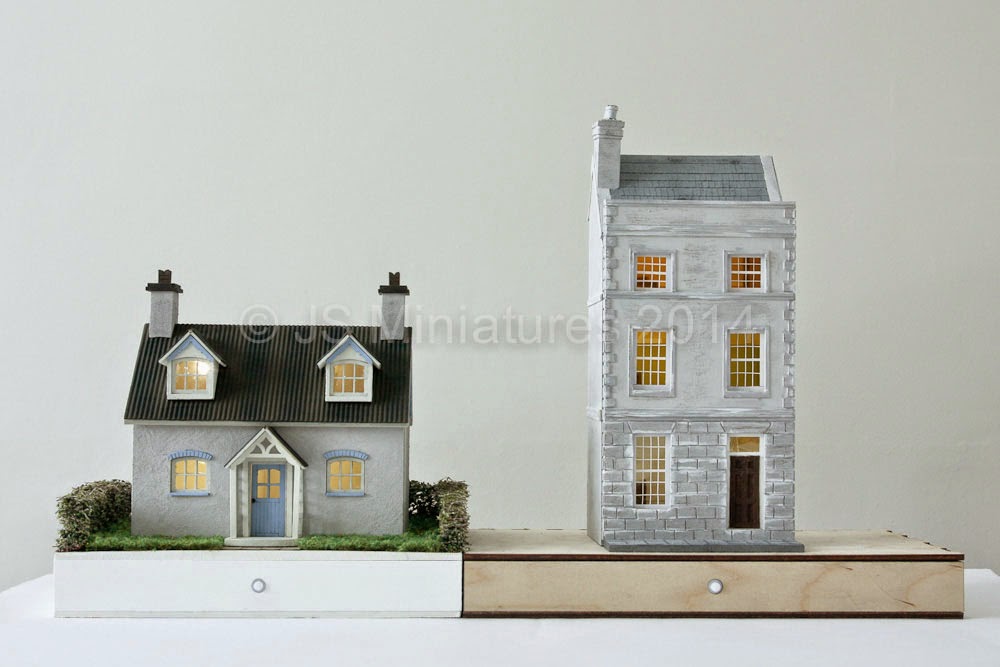
I have designed a couple of sizes of base kits that suit most 1/48th scale house kits or several smaller kits.  These are lasercut from 3mm ply and even have a concealed magnetic system so bases can be joined together to make a street scene.

Bases can be joined to form a street scene

They are designed to be used with any lighting kit but if you already have or are buying one of my lighting kits then I provide an extension wire with micro plug connectors so the lighting kit can be plugged into the extension and then the battery and switch neatly fit in the drawer.  The switch snaps into the hole in the front of the base for easy switching on and off of your lights.

Large base kit
Large base kit 

Large base kit with drawer open


I have assembled some landscaping materials including kits to make hedging & shrubs, realistic grass and I've also designed a picket style fence with gate.  These are not yet on the website but please contact me if you are interested.  These materials are often sold in large quantities for model railways so I will supply smaller kits, with instructions so you have enough to do one or two bases and don't get left with a mountain of stuff you don't need!

The bases are available here: Bases for smaller scale kits and prices range from £12.99 - £16.25 (discounts for buying more than one)

Best wishes,

Jennifer,

17 April 2014

Competition - Win a Warhammer 40k Lighting Kit!

To celebrate the Easter bank holiday I am running a competition to win one of my new Warhammer 40k lighting kits.

You can choose from one of 3 kits with choice of colour:
 - chip LED kit containing 2 x chip LEDs & coin cell battery kit with on/off switch
 - 3mm LED kit containing 2 x 3mm LEDs & coin cell battery kit with on/off switch
 - 3mm LED vehicle kit containing 4 x 3mm LEDs & either a 2xAAA battery kit or coin cell battery kit with on/off switch

These kits were launched 2 weeks ago and have been very popular already so this is the ideal opportunity to light your model.
Full details of the kits can be found on my website here: Warhammer Lighting Kits

The Rules:
1) You must like and share the competition link on Facebook / blog / twitter or forum and let me know so I can add your name to the list.
2) Entrants must be from the UK only (international postage costs are just too high)

Each entrant will be given a number and a winner will be picked at random using a random number generator.

Closing Date: Friday 25th April 2014 @ 8pm

Good Luck to everyone!

Jennifer,

Examples of customers who have already lit their models using the chip LED kit:

Warhammer 40k Imperial Knight lighting kit
Imperial Knight with blue chip LED kit

Warhammer 40k chip LED lighting kit
Warhammer soldier lit with red chip LED kit

Warhammer 40k chip LED lighting kit
Warhammer soldier lit with red chip LED kit

31 January 2014

Tutorial - Making Modern Strip Lights

It's been a fairly busy start to the year which is why I've not had a chance to update my blog until now. Hopefully you will enjoy another tutorial.

I was asked at the end of last year about making modern strip lighting, the type with a fluorescent tube with a cover which are found in all kinds of modern businesses from offices to dentists surgeries.  I mention dentists surgeries because thats what the lady (who wishes to remain anonymous) was making.  A 1/12th (Inch) scale room box dentists surgery.  Since then I've also provided the same lighting for a 1/12th scale shed/workshop.

The easiest and cheapest way to create strip lighting is to use flexible strip LEDs and use vellum to create the cover.  Vellum is a type of heavy paper, a bit like tracing paper, which comes in lots of colours and patterns and is used mainly for card making and scrap booking but is ideal to use with LEDs because the plain vellum is semi-opaque and as well as looking like a strip light cover, it also acts as a diffuser.

First off here's what it will look like!  Yes, this is a model and not the real thing!

Strip Lights in a 1/12th scale Dentists Surgery

Strip Lights in a 1/12th scale Dentists Surgery
Tutorial

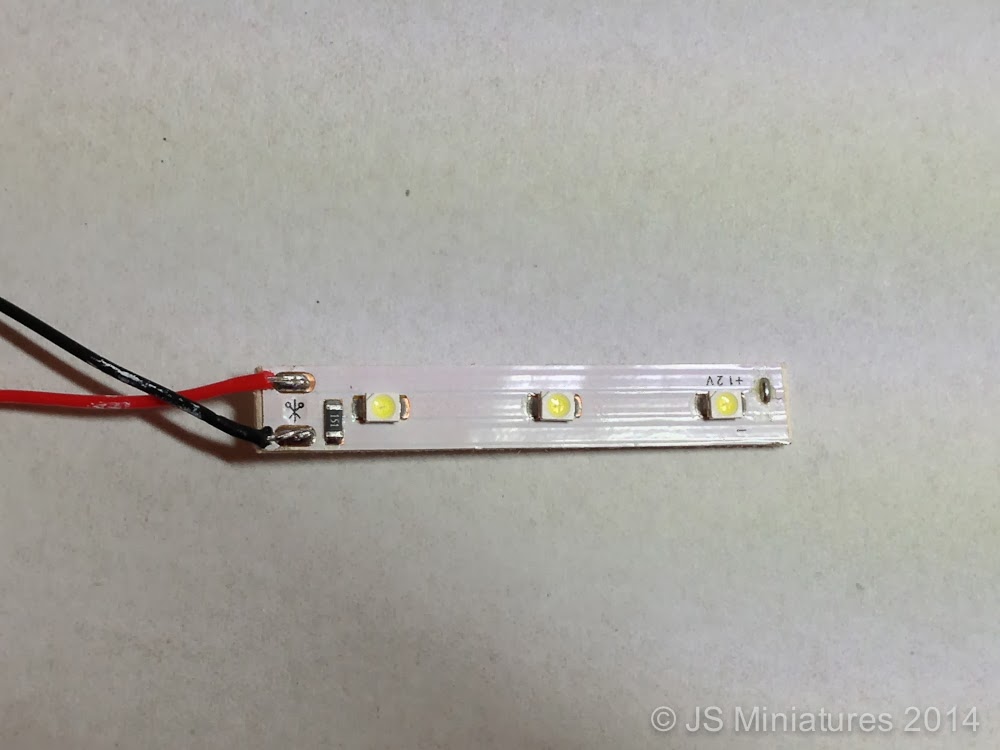
Step 1:  Choose the size of flexible LED strip you wish to use and also the colour.  For the tutorial I have used a 3 LED white strip but the photos above show a 6 LED strip in warm white.
Pre-wired LED strips can be bought in my shop if you have your own vellum but I now also have a strip light kit available with vellum included.  If you would like the 9v version you will need a battery snap.


Pre-wired flexible LED strip

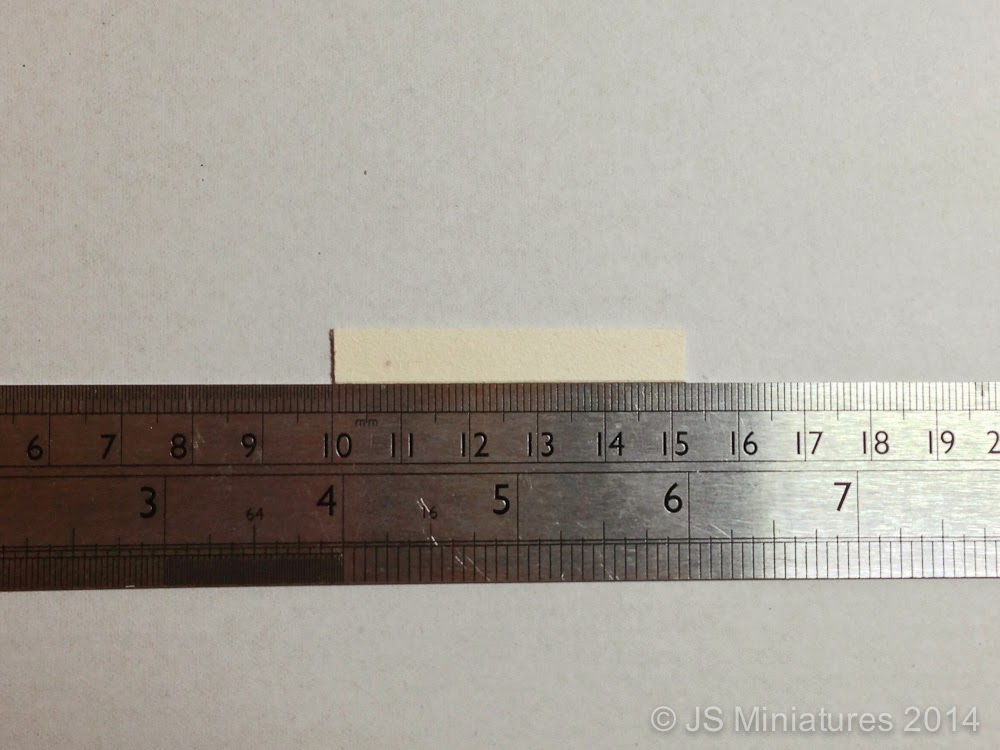
Step 2:  Cut a piece of thick card or mountboard 2mm longer than your LED strip.  For the 3 LED strip this would be 52mm long x 8mm wide.  (The strips are all 8mm wide).

Mountboard or card strip


Step 3:  Peel off the cover from the back of the LED strip to reveal the double sided tape and stick the LED strip onto your piece of card or mountboard.

LED strip stuck onto mountboard
LED strip stuck onto mountboard 

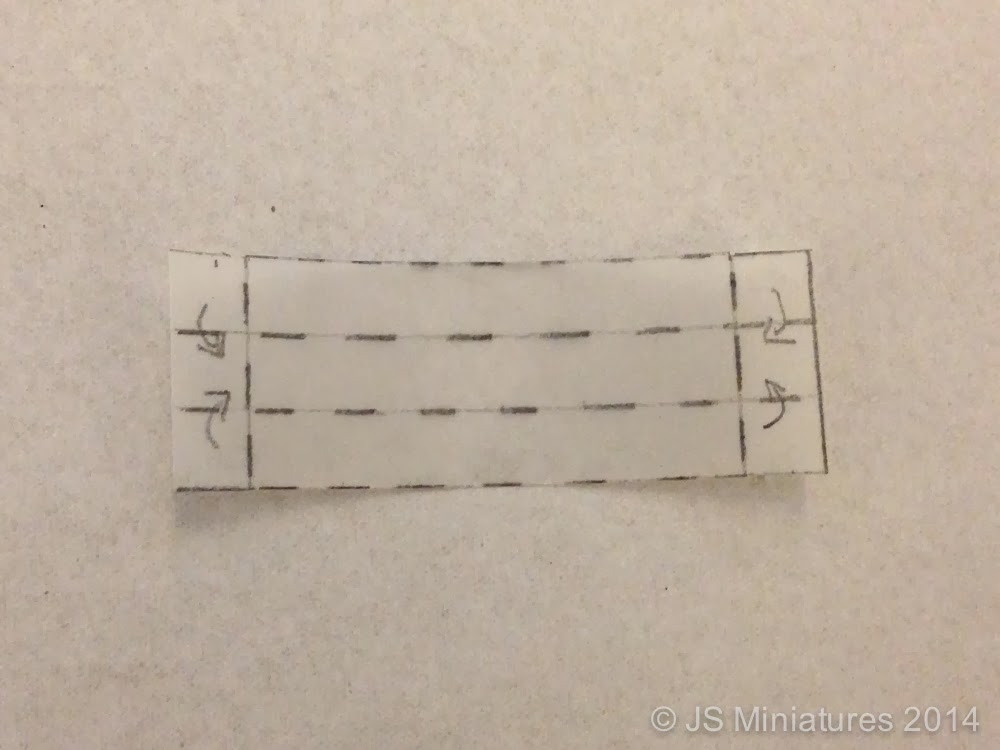
Step 4:  Mark out a rectangular box on your piece of vellum following the design of the template below.  You want the box to be 8mm wide and 8mm high.  The further away the vellum is from the strip the less the LEDs look like "spots".

Vellum template
Vellum template

Following the template above mark out your 3 strips 8mm wide.  Mark 8mm in from the end, then 52mm long (or length of LED strip) and then another 8mm for the other end.

Score along the lines with a pair of scissors being careful not to score too deep as the vellum will tear easily if scored deeply.  Snip the two ends from the outer edge into the fold line so they can be folded in to form the box end like so:

Vellum template ready for folding


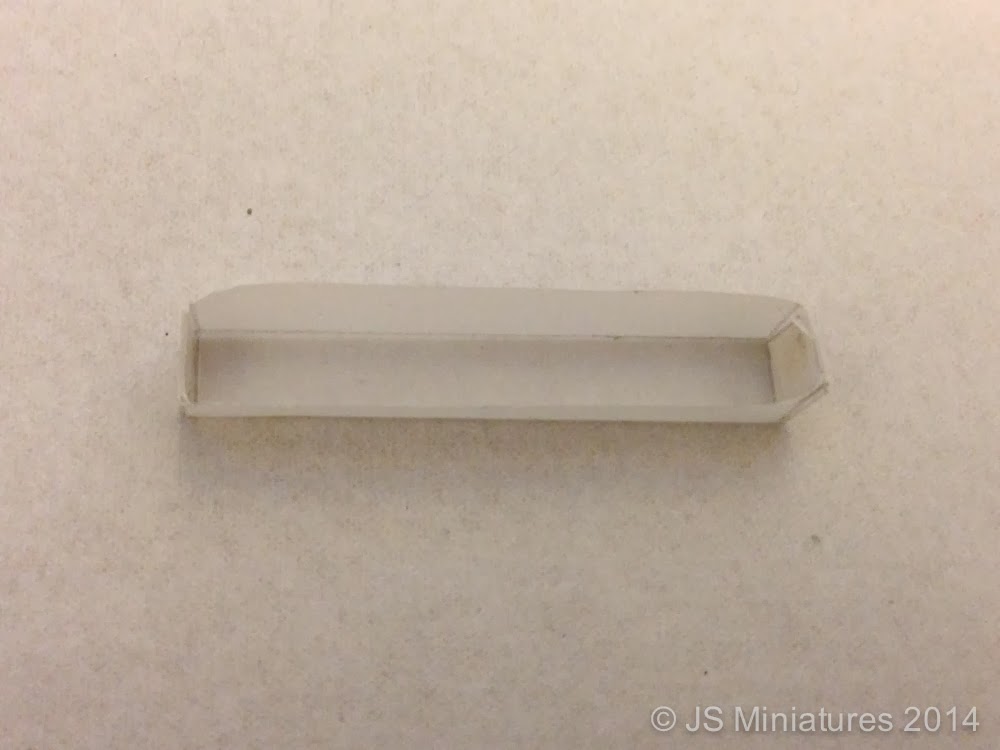
It should then look like this:

Vellum box diffuser for strip light

The ends are stuck with small squares of double sided tape.  Fold the two outer pieces in and then the middle piece over the top so it is on the outside.

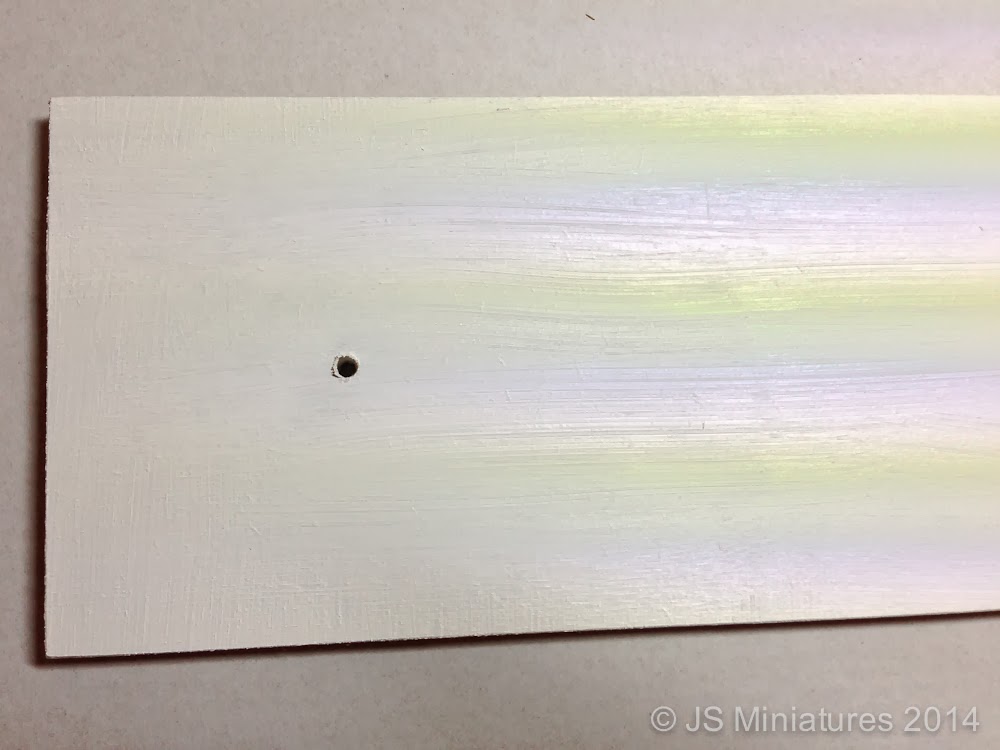
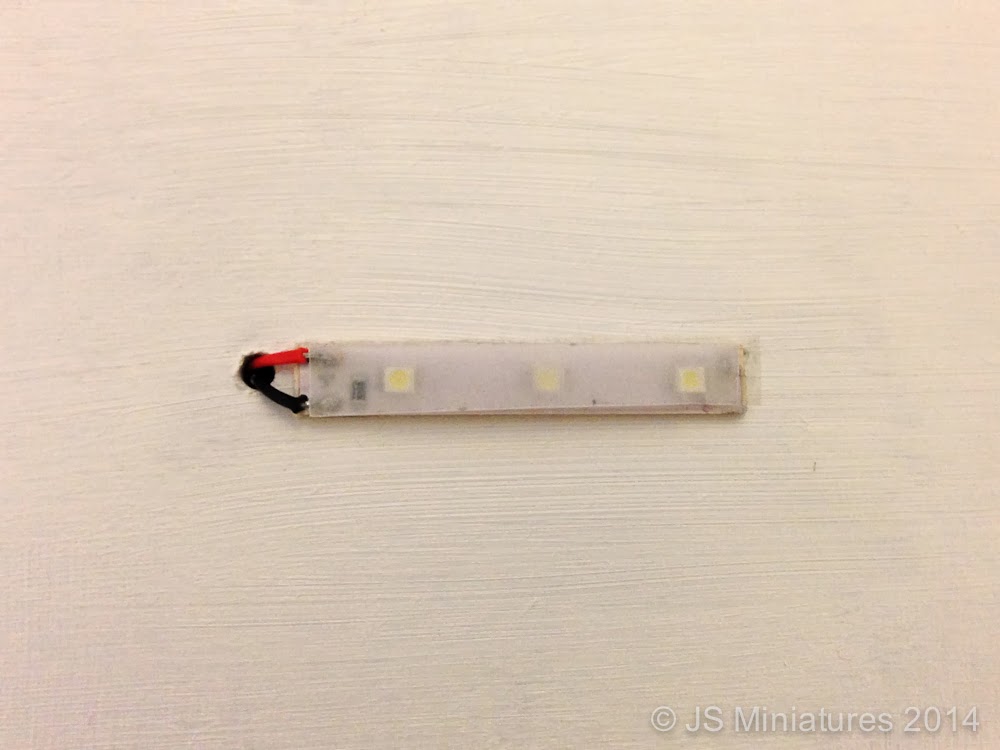
Step 5:  Decide where you want to place your lights and drill a 4-4.5mm hole in your ceiling.  Just enough for the wires to fit through.  Feed the wires through the hole and stick the LED strip in place with double sided tape or glue.  Keep the strip as close to the hole as possible (see photo in step 6).

Hole in ceiling for wires


Step 6:  (Optional)  If you wish you can cut an additional strip of vellum 8mm wide by the length of the LED strip and stick it on with small pieces of double sided tape to make an additional diffuser.

LED strip fixed in position

Step 7:  Fit the box over the LED strip.  It will be a snug fit but to fix in in place run some glue along the edge of the card / mountboard base and hold until stuck.  Use sparingly.  UHU or similar clear glue is best as most glues will show through vellum.  You may want to test your glue on a bit of scrap first.

NB:  You will probably need to snip away a bit of the box end for the wires to fit if you are not fitting a false ceiling.

Vellum cover fixed in place over LED strip

Step 8:  Test out your lights!  Connect to a 12v regulated transformer or you can also use a 9v battery (the LEDs will be a bit dimmer).

Modern strip light
Modern strip light


Final touches:  The wires as they enter the hole can be painted to match your ceiling.  Any matt emulsion or acrylic craft paint will do. 

The wires can be hidden in a groove in the floor above and then taped over with masking tape ready for your flooring of choice.

The other option is to fit a false ceiling.  This could be a piece of mountboard, foam board or thin wood with a slot cut out for the strip light so the wiring is hidden underneath.  It is best to fit a false ceiling before fitting the vellum box over the top.

The you can sit back and enjoy your lights!


Strip lights in model dentists surgery
I hope you have enjoyed this tutorial.  If you have any questions I'm happy to help.

My thanks to M from Stornoway for providing the photos of her lights in her dentists surgery.


Best wishes,

Jennifer, 

How to connect the strips to a transformer or 9v battery:
It is common for more than one strip to be used in a room so there are a few options:

a) If you are using copper tape the strips would be soldered on directly. 

b) You can chose to have the strips wired with standard dolls house white wire which could then be wired into a standard dolls house plug and socket strip. You would need one plug per LED strip in this case and please check with me to make sure your transformer won’t exceed it’s capacity (eg a 6 LED strip is 0.04amps).

c) If the transformer comes with a 2.1 mm socket, I sell connectors that plug into the transformer directly but have a connector block on the other end so you can wire in multiple lights to the same transformer without needing a socket strip.  To purchase connectors click the link: connectors

d) If you wish to use a 9v battery you will need a battery snap.  You can also choose to have an mini on/off switch with your battery snap.  To purchase battery snaps click the link: Battery snaps

I recommend using no more than 2 LED strips per 9v battery to prevent it running out too fast. LEDs will be slightly dimmer with this option.

Hope that helps. 

This tutorial is for personal use only and must not be made for sale or commercial purposes.  
All text and photos copyright of JS Miniatures.