I have had a few inquiries about ceiling spotlights recently and one of my customers has successfully installed them in a modern art gallery shop box to display her miniature paintings so I thought it was the ideal opportunity to do a quick tutorial to show how easy and effective they are!
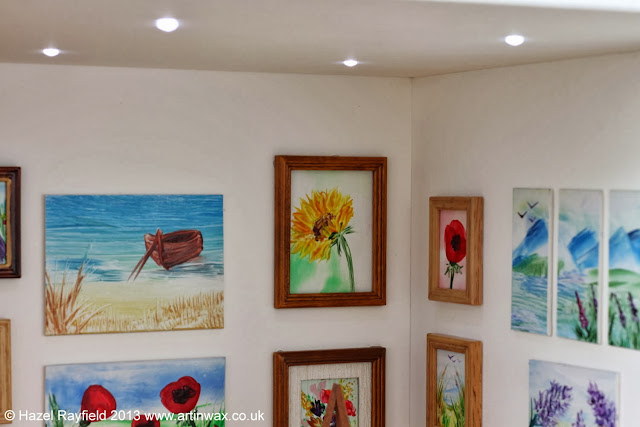
Firstly, this is the interior of Hazel's finished room box. She wanted to create a modern art gallery that was well lit with even lighting which would show her paintings to best effect.
I suggested using 3mm high brightness LEDs with clear lens clips which hold the LED in place and also act as a diffuser, spreading the light and making it very even (Standard round top LEDs normally produce a spotlight effect).
 |
| Finished art gallery with LED spotlights |
 |
| Close up of LED spotlights |
I drew up the plan below in CAD. It shows the LEDs at 6 inch centers (150mm) and Hazel also wanted three additional LEDs for the shop windows and the front door.
 |
| CAD plan for layout of LED spotlights |
Depending on your room or box you can either make grooves for the wires using a dremel, or by hand. You can then secure the LED and wires in place with masking tape over the top or, if you don't want to make grooves you can just stick the wires down with masking tape and cover with your flooring or roof material the same as you would usually do with lighting wires.
The clips are designed for 3mm thick material but this can be worked around by drilling a slightly larger hole (ie 4.5mm) and if necessary, the clips can be glued in position with tacky wax or superglue or similar. Just a tiny drop in the hole to secure. I find the clear clips tend to hole pretty firmly though without glue.
 |
| Clear lens clips - installed in a ceiling (demo) |
Once the clear clips are in position you simply push the LED into the clip until you hear a 'click'. It's best to have one finger on the 'spotlight' so the clip doesn't get pushed out of the hole.
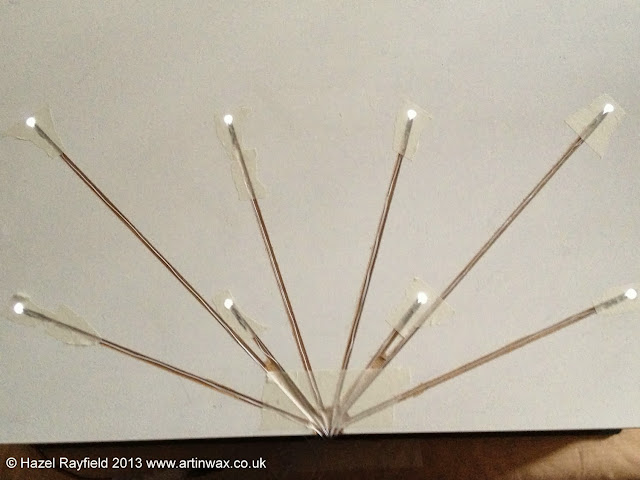
Once you have positioned all the wires you should then have something like this:
 |
| External view of room box roof showing LED wiring in grooves |
This was a very large room box - the Victorian Shop Box kit from the Dolls House Builder which is 23" L x 16" W x 12" H (590 x 400 x 298mm) which is a huge shop! The entire spotlight kit including 11 pre-wired LEDs, 11 clear lens clips and 2 AAA battery kits only cost £30 so it's a fairly cost effective solution.
The LEDs were wired with the white wire found in all dolls house lighting which has the advantage of being flat and so very neat to hide but it is slightly more expensive than the standard red & black wire I can also supply.
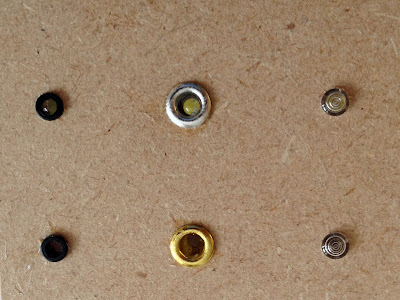
Other clip options include black ring clips or brass or nickel metal 3mm eyelets. Top row shows each clip with a 3mm LED installed. Lower row is the clips on their own.
 |
| Spotlight clip options |
If you'd like to read more about the creation of Hazel's Art Gallery with lots of finished photos including the shop frontage, click on the link: Hazel Rayfields Art in Wax Blog.
I'd like to thank Hazel for allowing me to use the photos of her finished art gallery.
I hope it's a useful tutorial and perhaps inspires you to try something similar.
Jennifer,
***UPDATE***
If you would like to try your own spotlight ceiling you can purchase a ceiling kit here:
Ceiling Spotlight Kits
There are three options to suit different sizes of project or room.
This tutorial is for personal use only and must not be made for sale or commercial purposes. All text and photos copyright of JS Miniatures.


